A 3D Printed Racing Sparrow!
The time has come, and I finally made the call to try and 3D print a Racing Sparrow model yacht. This is quite a departure from the origins of Racing Sparrow models, or so I first thought.
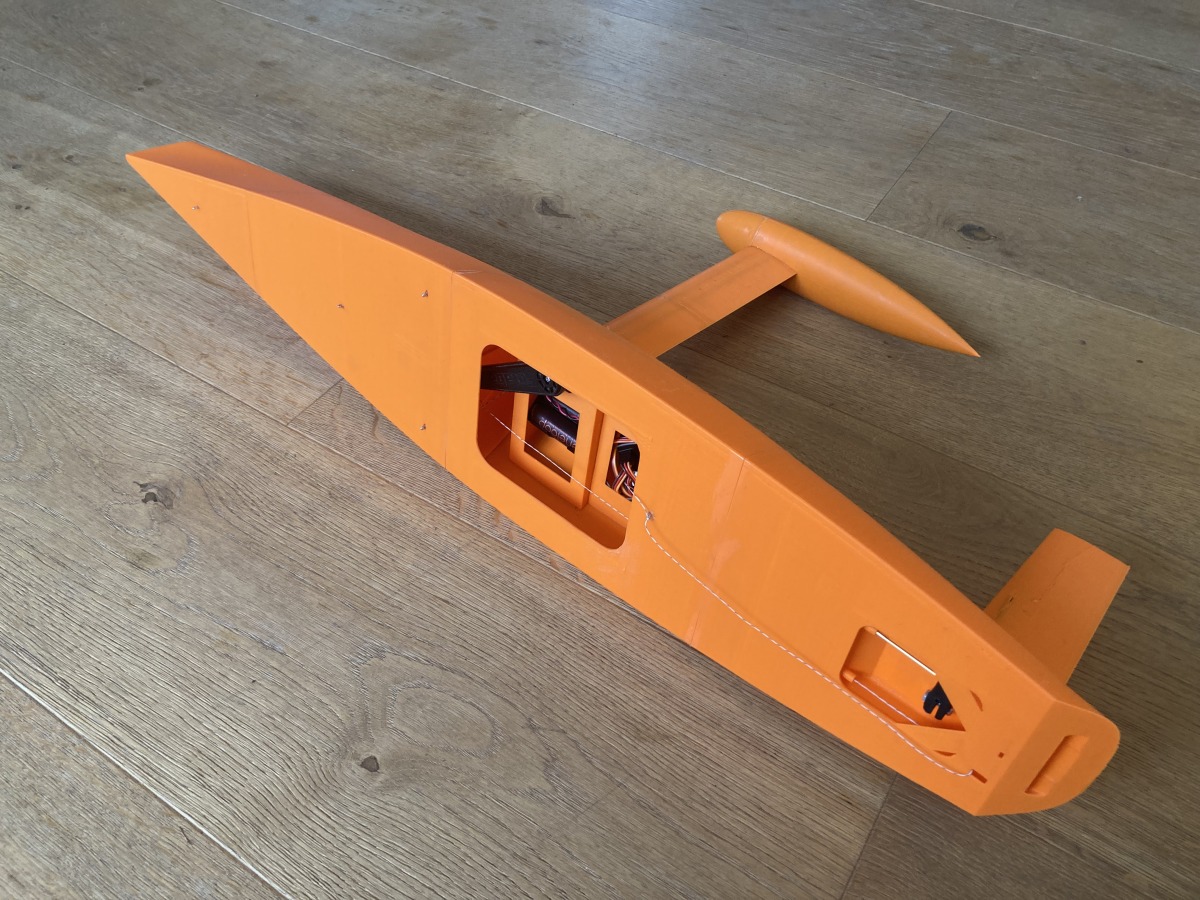
The Racing Sparrow 3D is 760mm in length printed with PLA filament. This one is well .... orange!
Read the updated progress report blog post.
Update: STL files now available!
The internal struggle I had was to stay true to the spirit of Racing Sparrow, which is radio control yachting for beginners. Easy building without specialist tools and a gentle introduction to this great hobby.
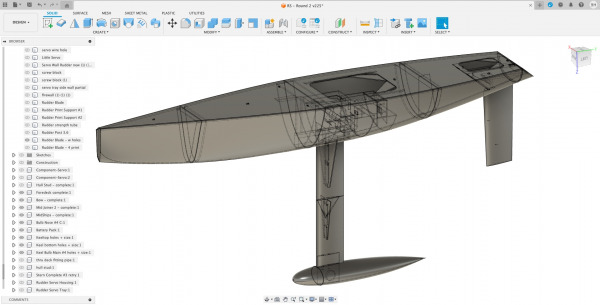
The design in Fusion360
3D printing does require an expensive tool, in my case a Creality K1 Max 3D printer, and some computer skills to drive the thing; but once you start digging and playing, you realise that this relatively new technology can make the process of building an RC yacht much simpler and much faster.
It allows you to build a very accurate reproduction of the design in a fraction of the time. You don't even need a 3D printer, as you can outsource that part and get the parts printed and delivered to your door. This way of building a boat is fast becoming a viable and common way to make a boat.
What will be the outcomes of this project?
The goal is to have available for sale a set of STL files and also an instruction PDF to complete the build, including rigging and sailmaking instructions. If I get enough interest, I may also sell 3D printed kit sets with all the parts ready to assemble. I am hoping to have this available by the end of the year (2024).
 What are the main features of this 3D design?
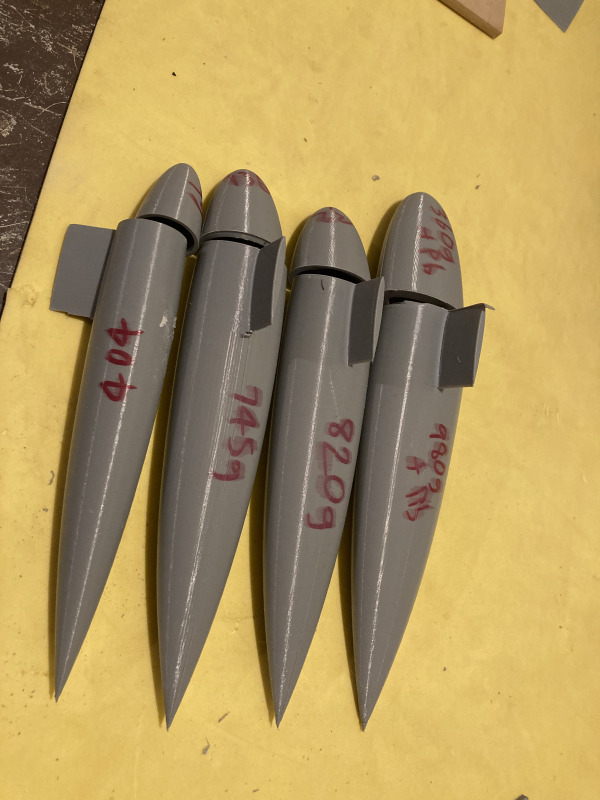
Here are the main features of the project: It is easy to print. All parts are ready to print as an STL file. I have designed the Racing Sparrow 3D hull to be printed in 4 parts. No part exceeds 207mm, which most home hobby printers can do. Each part has interlocking flanges, meaning no extra 3D modeling is needed and no special parts need to be made to join the hull together. You can just download the STLs and print them out without any adjustment.
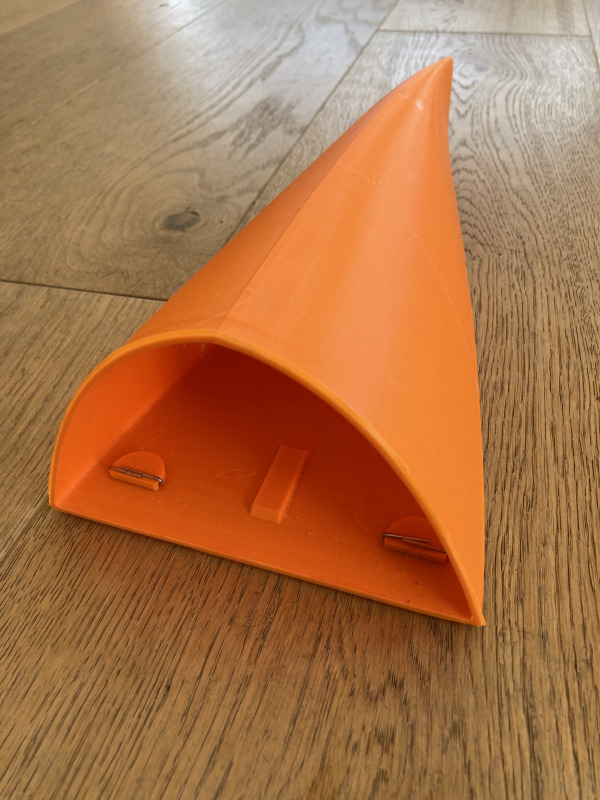
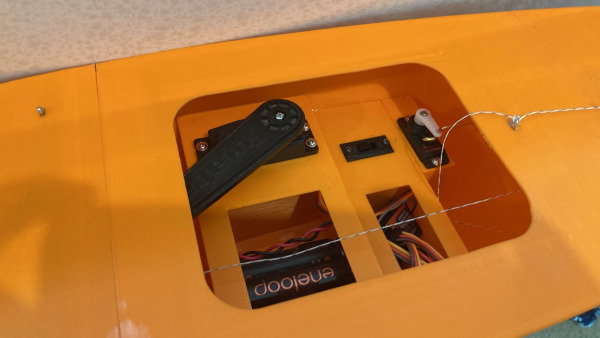
The electrics used in this boat only need to be cheap servos, no winch needed. The batteries are standard Ni-MH rechargeables, no need for LiPo batteries or voltage converters. The lead bulb is a printed bulb shell that you fill with lead shot from a gun shop. No melting lead with gas is required. The rigging for this design will use 1-meter carbon tube for the mast and carbon tubes for the booms, all readily available and cheap these days.
As you can see in the images the hull fixtures are made with a printed part and a split pin. Cheap and cheerful!
Where have I got to so far?
I have just finished designing, printing, and assembling the hull, keel with bulb, and the rudder. I now need to move on to the rig and sails. I will be designing and printing all the rigging fittings like spreaders, toppers, and fixings. The sails will be 1 piece with battens taped in. The aim with the rig will follow the same principles of simplicity and availability of materials. I am currently sourcing and trialing different sail materials to see what is cheap and what works best.
 What problems have I got to overcome with the design?
The hull I have printed seems mostly strong enough, but I'm sure once I sail this boat in testing, we will truly see where things need to be changed. The keel has 2x3mm carbon rods epoxied into the center; the 3D printed parts alone are just not strong enough to allow the keel to be completely 3D printed. Even with 2 carbon rods, the keel has some flex. It will be interesting to see how well this boat sails and for how long it stays in one piece!
I have used West System 2-part epoxy to join the hull and internal parts. This cold weather in New Zealand we currently have has made curing times and strength problematic. Again, testing the boat will be interesting!
 The benefits of 3D printing.
One of the best parts of this experiment is I can simply adjust the model in Fusion360 and press print. A few hours later, a new stern or keel or whatever appears ready for installation. After sea trials, I'm sure a second iteration will be built and re-tests required. I won't be releasing any STL files until I'm confident I have ironed out any issues with the design.
If you are interested in getting your hands on the files, please email info@racingsparrow.co.nz to join the waiting list. I may have files in a beta stage for free in a few months after the first sea trials have been done.
I will write another blog post with photos of the first sailing and show off some more details.
Happy printing! and happy sailing, Bryn H.