Radio Controlled Yacht Electrics - For Beginners
To a complete newby the electrics setup and installation may seem quite daunting. It's not easy to work out how everything plugs together. What batteries to use and where to buy.
When the RacingSparrow book was first released in 2007 the electrics were not as sophisticated but the servos and plugs have remained much the same. The transmitters, receivers and batteries have all progressed with more options. Everything has become cheaper and more reliable.
We break it down in this article. Links to components are shown.
It's worth noting you don't need to do any soldering or custom wiring. It is all about the correct components that plug into each other. The most technical thing to get right is the battery voltage. For standard servos and receivers 4 AA rechargeable batteries provide the correct voltage of 4.8V. This is the simplest setup with the least amount of components and cheapest overall.
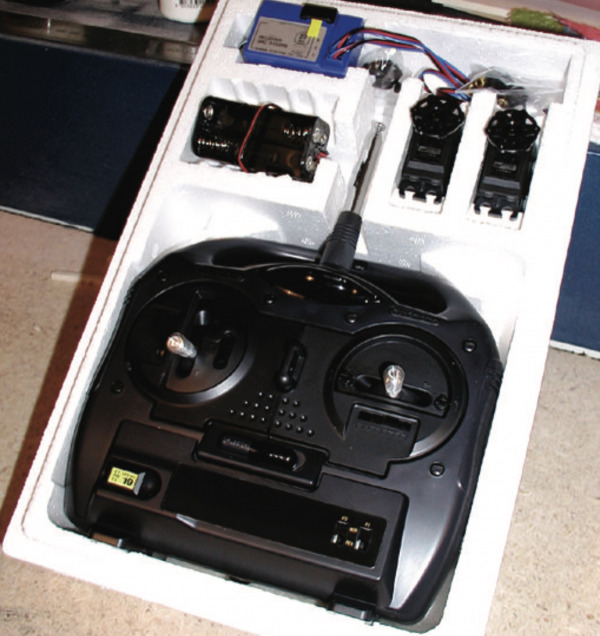
For a simple radio-controlled sailboat in 2023 like a RacingSparrow, you need a transmitter, receiver, 4xAA battery holder, and 2 servos (1 for sail arm, 1 for rudder) that plug into the receiver using JR connectors. Waterproof options and different servo sizes for sail arm and rudder are abundant. You can choose from a range of transmitter and servo options, from simple to high tech.
The most common plugs are JR connectors. There are other smaller and larger plugs but the JR style ones will fit all receivers and servos alike.
You will also see the abbreviations rx and tx used on most websites. These stand for receiver/transmitter.
 Components:
- Transmitter: Your handheld control unit. It sends signals to the receiver on the boat to control the rudder and sail arm. It has a its own battery.
- Receiver: Receives signals from the transmitter and directs the servos accordingly.
- Servos: Small motors that move the rudder and sail arm based on the commands from the receiver.
- Battery Holder/Battery: Powers the receiver and servos inside the boat.
Wiring:
The "wiring" in an RC yacht refers to the connections between the receiver, servos, and the battery:
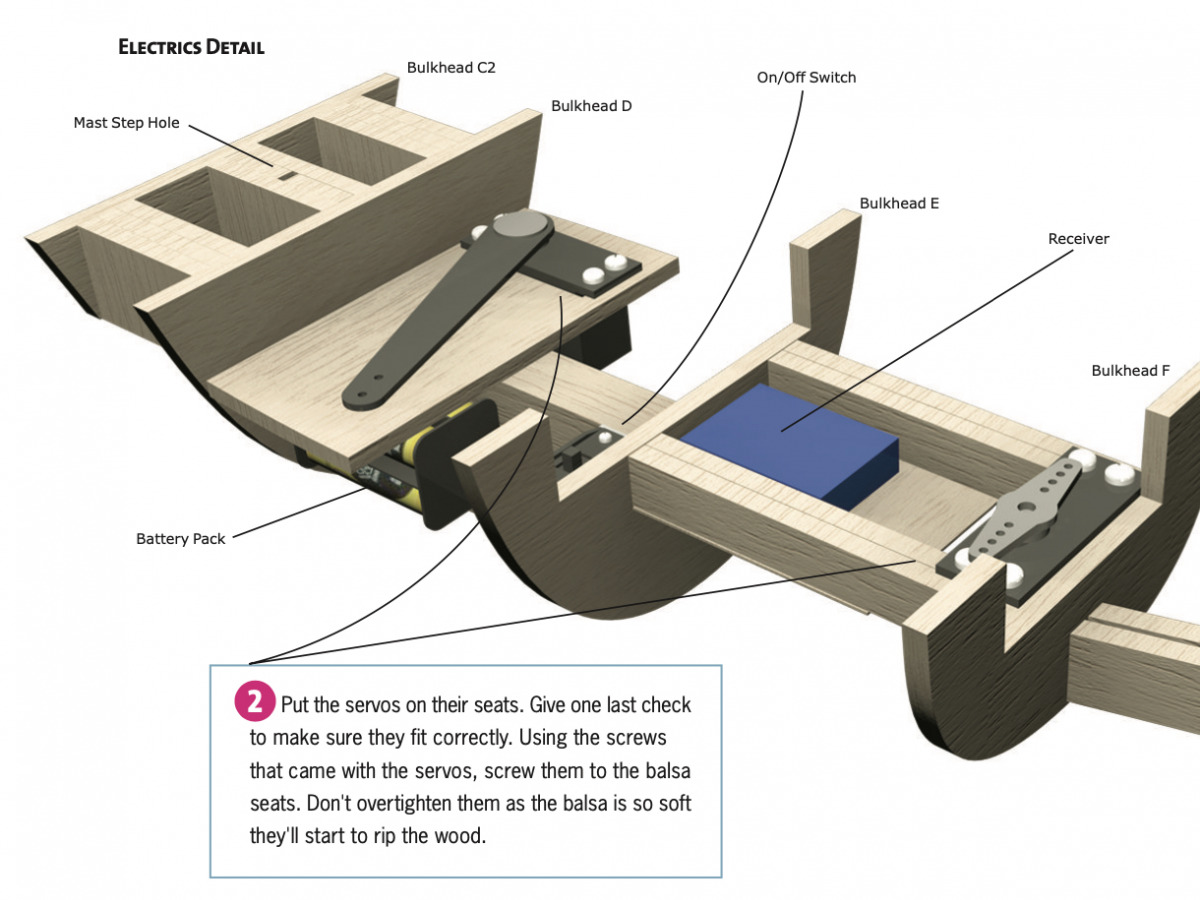
- Receiver to Servos: Servos are plugged into the receiver using JR connectors. Typically, the rudder servo goes to channel 1 and the sail arm servo to channel 2.
- Power: The battery or battery holder connects to the receiver to power the system. On most receivers there will be a battery channel or equivalent.
Setup Options:
Now, based on your budget and preference, here are three setup options:
The Simple Setup (NZD$70):
- Transmitter & Receiver: A basic pair will do the job for beginners.
- Servos x 2: One for the sail arm and one for the rudder.
- Battery Holder: Holds standard AA batteries to power the system.
- Batteries: Regular AA batteries.
The Mid-Range Setup (NZD$230):
- All Waterproof Components: Ideal for those who plan to sail in rough conditions
- Transmitter: Great quality with many options.
Receiver: Waterproof with strong casing.
Sail arm servo: Hi-Torque Waterproof.
Rudder servo: Waterproof Analog Micro Servo w/Metal Gears. - Rechargeable battery: A more sustainable and reliable power source compared to standard batteries.
The No-Limits Setup (NZD$720):
- Transmitter & Receiver: Opt for high-end models with advanced features for better control and longer range.
- Sail winch servo: Provides precise control over the sail position, crucial for competitive sailing.
- Rudder servo: High-quality servo for accurate steering.
- LiFe battery: Ensures a consistent power supply for extended sailing sessions.
Each setup above provides a progressively enhanced sailing experience, from casual sailing to competitive yachting. The wiring remains fundamentally the same across all three setups, but the quality and features of the components improve as you move up the price ladder.
If you're having trouble sourcing the parts try our forum for up to date intel.